These tips are extremely important for learning the basics of Google Sheets. We’ll go over adding headers, sorting your data, and grouping rows in your Google Spreadsheet. Don’t worry I keep it simple in this tutorial, however, I reference some other articles if you want to dig deeper into these topics.
How to add a header in Google Sheets
Well, to be technical we’re not actually adding a header. Instead, we are freezing rows/columns that will follow you as we scroll.
If you notice you’ll see gray lines on the top left of your spreadsheet, dragging these will freeze the rows and columns that are above or to the side, ultimately freezing those cells.
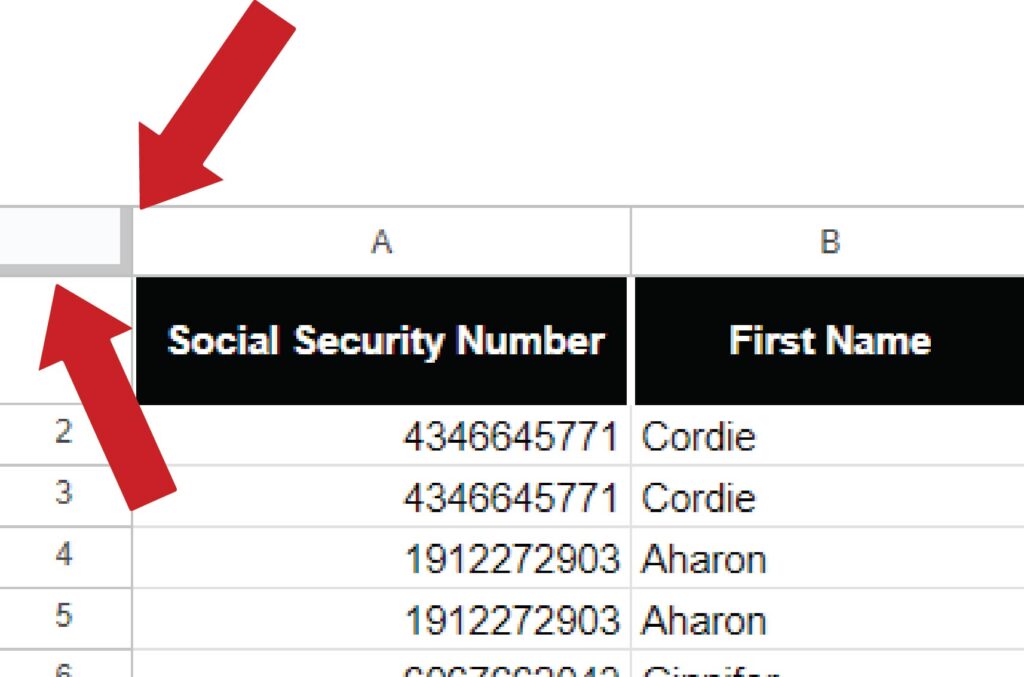
Here’s a visual of how dragging these will work.
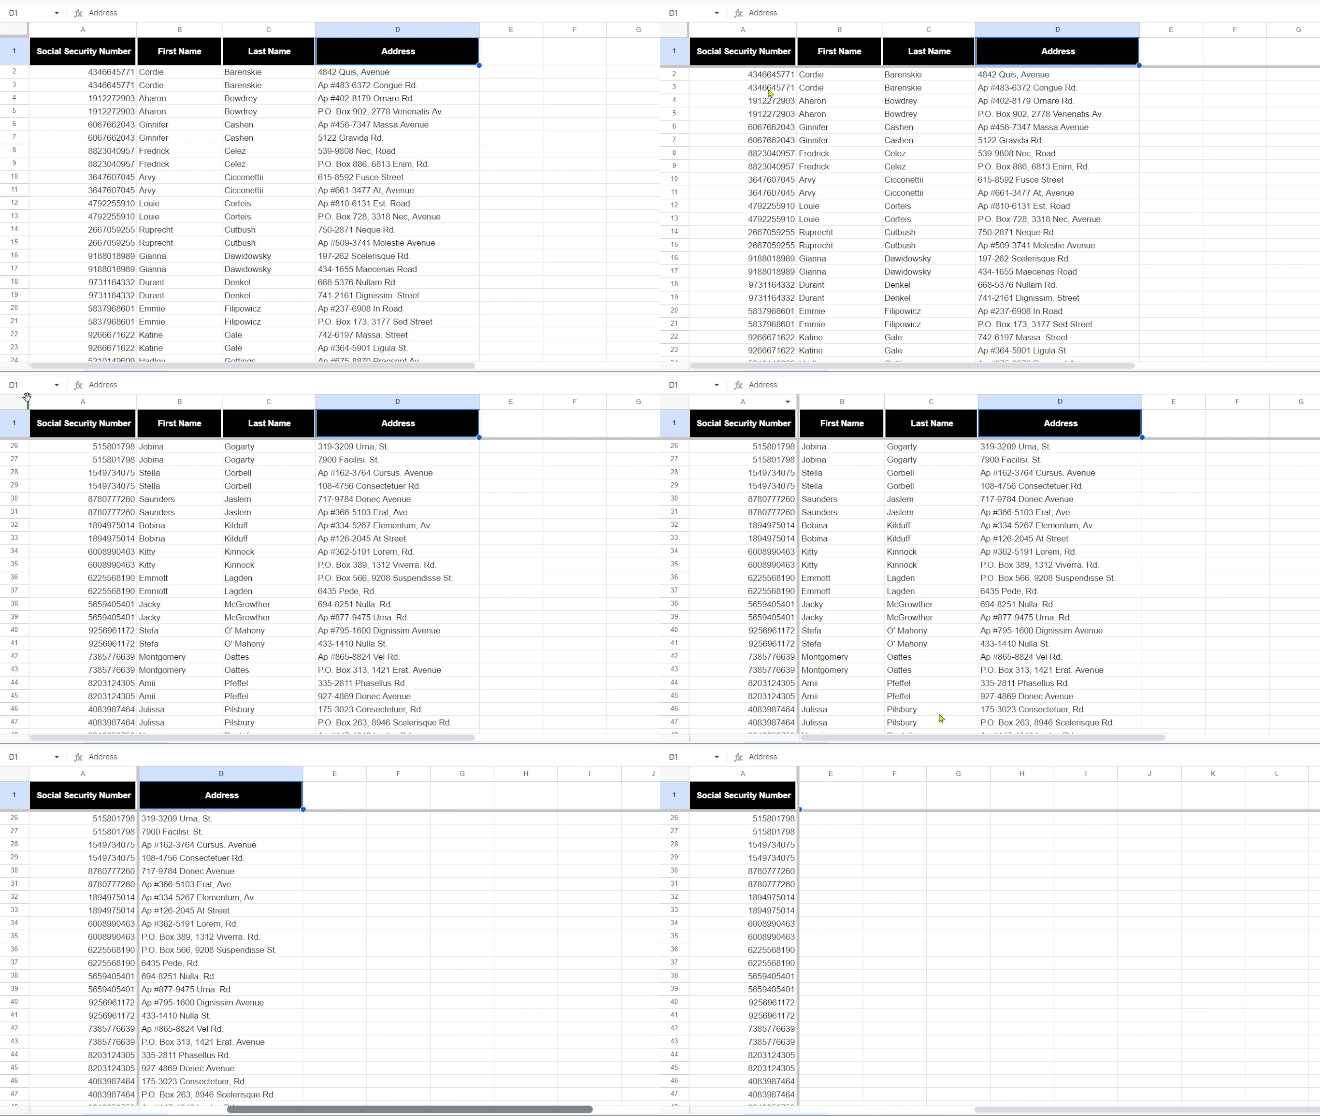
Happy scrolling!
How to sort in Google Sheets
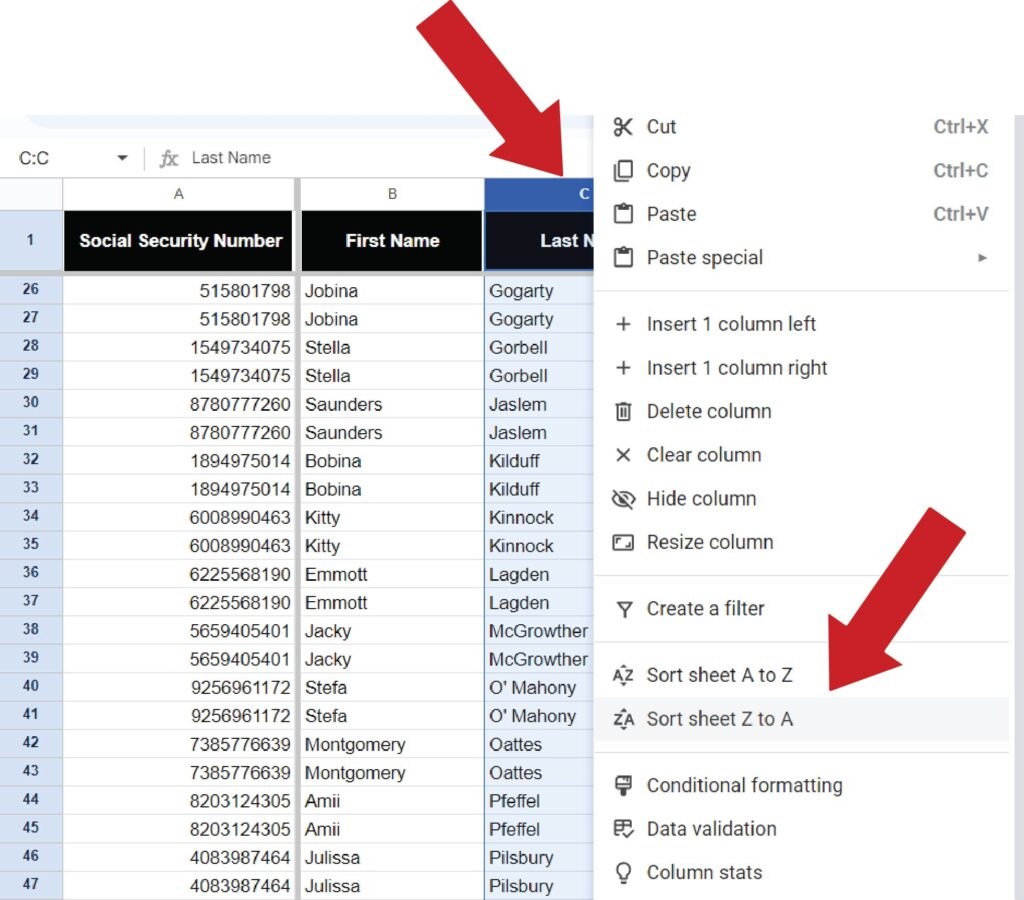
For simple column searches, all we have to do is select the whole column, right-click, and sort.
For more complex searches, view this great article by a site called Lido. Google also has some great pointers for their sort and filter features. If you’re a beginner, I wouldn’t worry about those yet.
How to group rows in Google Sheets
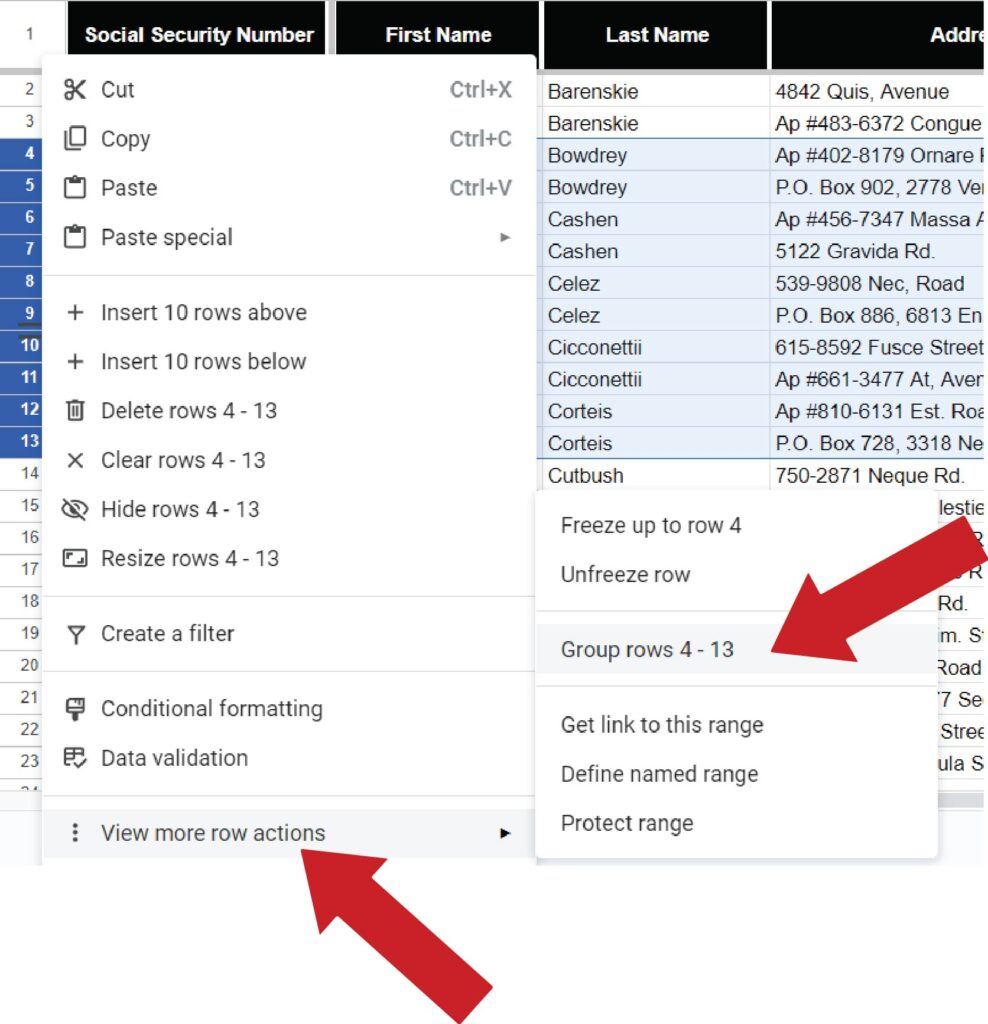
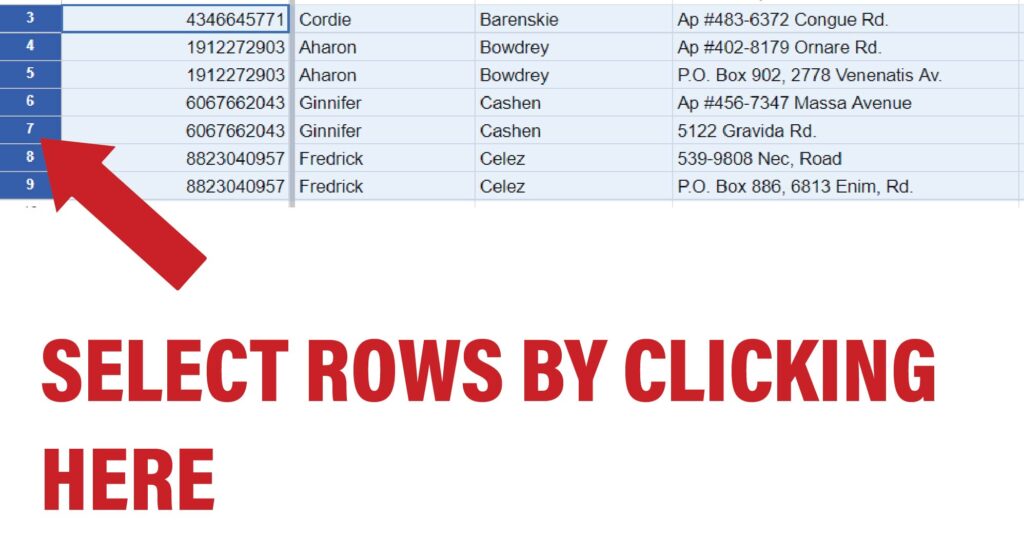
First, select the rows you want to group. Be careful – you must select these rows by clicking on the far left from the rows. Otherwise, you won’t see an option to group.
Next, right-click -> ‘View more row actions’ -> ‘Group rows’
